


Table of contents
Hi everyone👋, As a programmer, you can always utilize your skills by developing tools that can serve the same purpose as other software you need, like in this case a screen recorder. In this article, we are going to make use of Python. Python performs a variety of tasks, one of them being able to create a screen recorder.
In this tutorial guide, we will be using Python to create a screen recorder that can help you accomplish some common basic tasks just like any other software available out there. We will also be able to add some integrations to our apps such as the play, pause, and resume functionalities.
By the way, this article is sponsored by Lambda Testing which is a cross-browser testing platform that let's you test your web pages on different Os at the same time.
You can refer to my YouTube video to see a working tutorial for better understanding and a step-by-step guide of the same.
Creating GUI
We will be using Tkinter for creating our GUI, actually, we will be designing the complete UI inside Figma and exporting it into a Tkinter file using Proxlight Designer ( if you don't know what Proxlight Designer is then please watch our complete tutorial guide ) .
- Here is the complete code 😊
import pyscreenrec
from pathlib import Path

from tkinter import *
# Explicit imports to satisfy Flake8
#from tkinter import Tk, Canvas, Entry, Text, Button, PhotoImage


OUTPUT_PATH = Path(__file__).parent
ASSETS_PATH = OUTPUT_PATH / Path("./assets")

rec=pyscreenrec.ScreenRecorder()

def relative_to_assets(path: str) -> Path:
    return ASSETS_PATH / Path(path)

def start_rec():
    file =Filename.get()
    rec.start_recording(str(file+".mp4"),5)

def pause_rec():
    rec.pause_recording()
def resume_rec():
    rec.resume_recording()
def stop_rec():
    rec.stop_recording()

window = Tk()
window.title("Quick Screen Recorder")
window.geometry("600x150")
window.configure(bg = "#FFFFFF")


canvas = Canvas(
    window,
    bg = "#FFFFFF",
    height = 150,
    width = 600,
    bd = 0,
    highlightthickness = 0,
    relief = "ridge"
)

canvas.place(x = 0, y = 0)
image_image_1 = PhotoImage(
    file=relative_to_assets("image_1.png"))
image_1 = canvas.create_image(
    295.0,
    40.0,
    image=image_image_1
)


button_image_1 = PhotoImage(
    file=relative_to_assets("button_1.png"))
button_1 = Button(
    image=button_image_1,
    borderwidth=0,
    highlightthickness=0,
    command=start_rec,
    relief="flat"
)


button_1.place(
    x=62.0,
    y=75.46883392333984,
    width=45.077056884765625,
    height=46.14019775390625
)

button_image_2 = PhotoImage(
    file=relative_to_assets("button_2.png"))
button_2 = Button(
    image=button_image_2,
    borderwidth=0,
    highlightthickness=0,
    command=resume_rec,
    relief="flat"
)
button_2.place(
    x=135.77452087402344,
    y=76.55374908447266,
    width=44.43916320800781,
    height=47.878379821777344
)

button_image_3 = PhotoImage(
    file=relative_to_assets("button_3.png"))
button_3 = Button(
    image=button_image_3,
    borderwidth=0,
    highlightthickness=0,
    command=stop_rec,
    relief="flat"
)
button_3.place(
    x=208.0035858154297,
    y=75.0,
    width=45.50230407714844,
    height=44.439170837402344
)

button_image_4 = PhotoImage(
    file=relative_to_assets("button_4.png"))
button_4 = Button(
    image=button_image_4,
    borderwidth=0,
    highlightthickness=0,
    command=pause_rec,
    relief="flat"
)
button_4.place(
    x=281.1537170410156,
    y=75.46883392333984,
    width=45.077056884765625,
    height=44.439170837402344
)


entry_image_1 = PhotoImage(
    file=relative_to_assets("entry_1.png"))
entry_bg_1 = canvas.create_image(
    468.5,
    103.5,
    image=entry_image_1
)

Filename=StringVar()
entry_1 = Entry(textvariable=Filename,
    bd=0,
    bg="#FFFFFF",
    highlightthickness=0,

)

entry_1.place(
    x=372.0,
    y=92.0,
    width=193.0,
    height=25.0
)
Filename.set("Untitled Recording")
window.resizable(False, False)
window.mainloop()
Recording Screen
We will be using pyscreenrec for recording our screen, pyscreenrec is a small and cross-platform python library for recording screen.
Installation
Windows :
pip install pyscreenrec
Linux / MacOS :
pip3 install pyscreenrec
- Here is a small example usage.
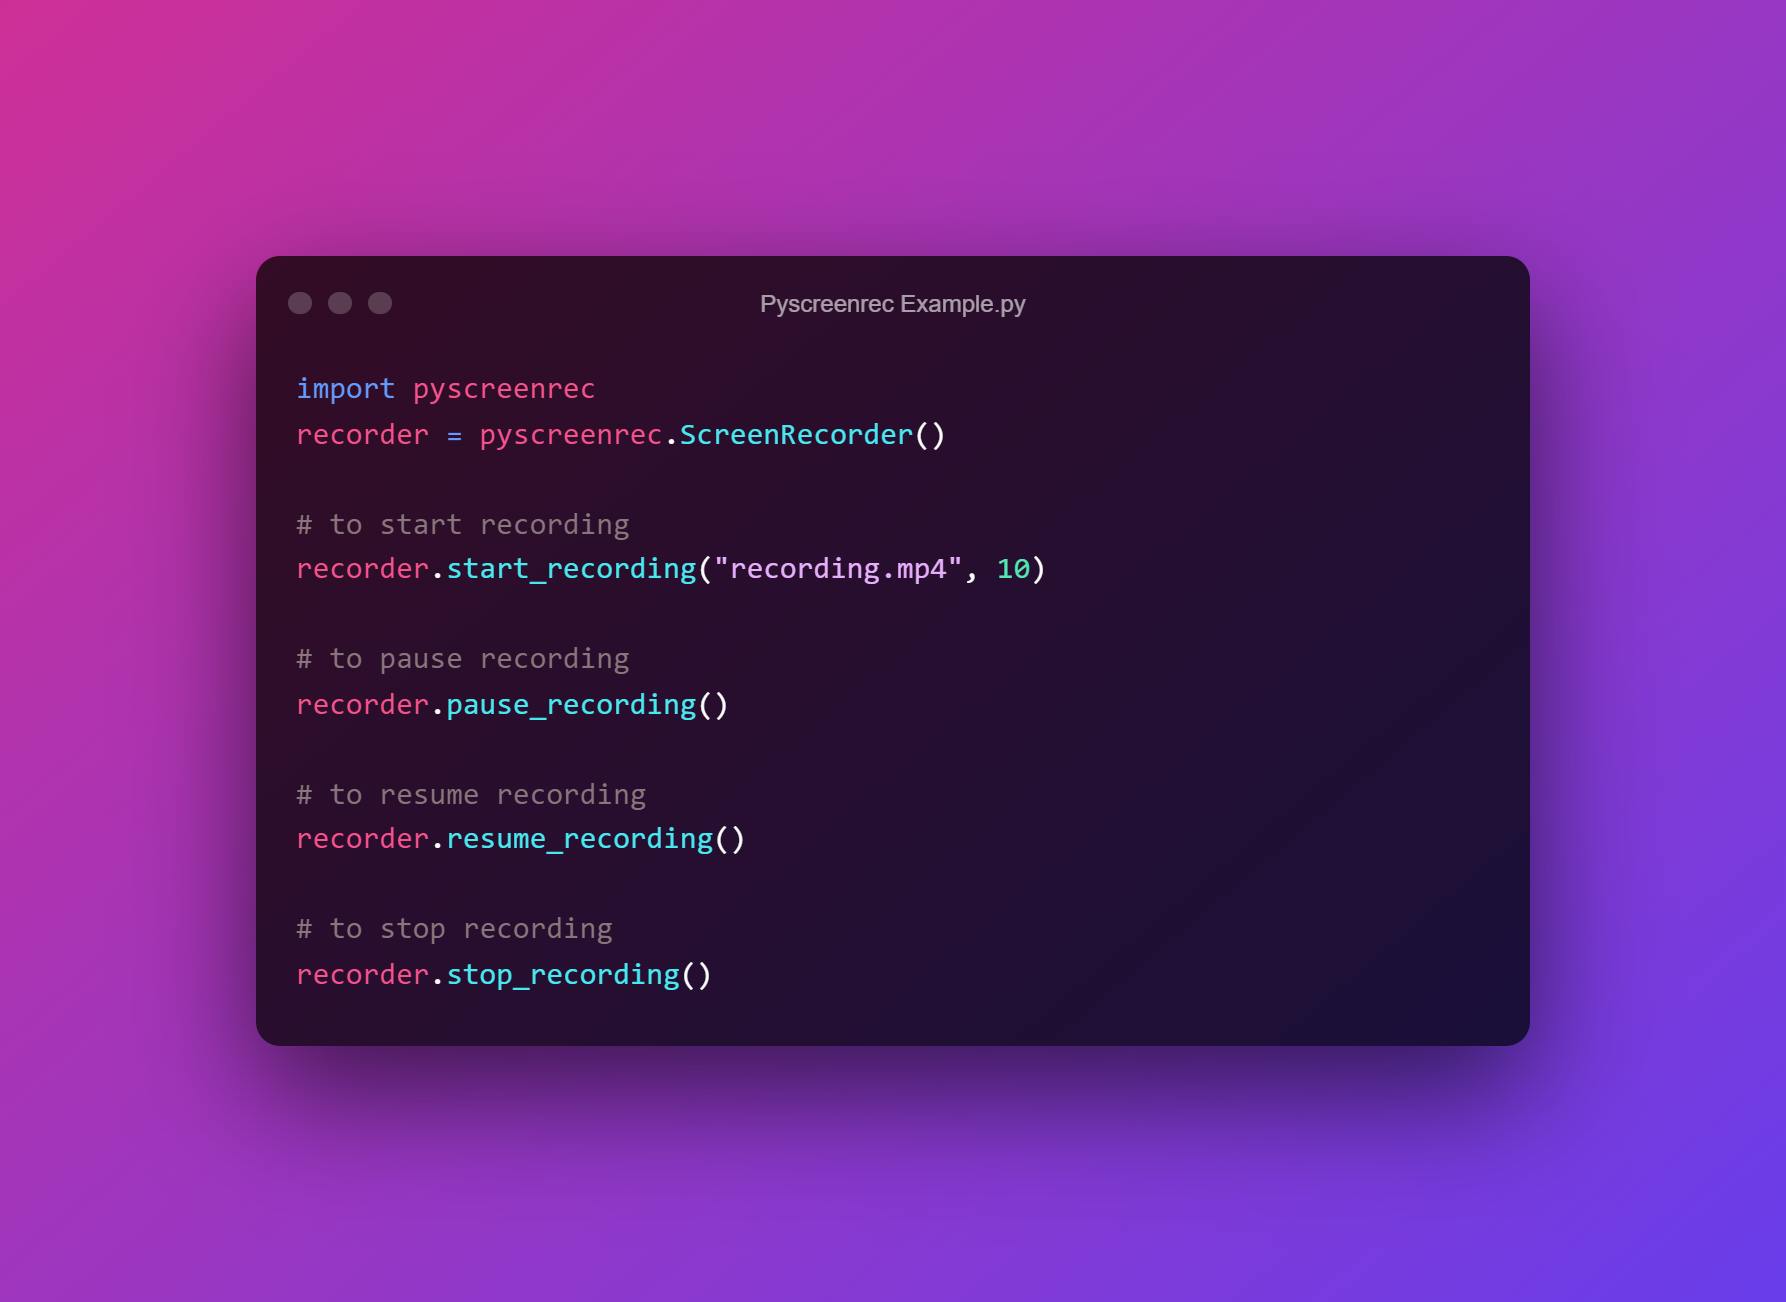
'recording.mp4' is the name of the output video file, may also contain full path like 'C:/Users//Videos/video.mp4' .
The second parameter(10) is the FPS. You can specify the FPS for the screen recording using the second parameter. It must not be greater than 60.
Known limitations
- pyscreenrec is yet not able to:
Capture the system sound during screen recording
Capture only a certain part of the screen
- You can manually set FPS for the screen recording, by an extra fps argument in start_recording method.
Conclusion
You can utilize the above knowledge to make a complete Screen Recorder which has functionality like Play, Pause and stop.
- You can download the come complete code from our Github Page.
Alright, guys! I hope this article was helpful for you if it is the leave your comments below. I will meet you in another article until then KEEP CODING🤗.